Run this notebook online:![]()
Run this notebook online:![]()
Transfer Learning on CIFAR-10 Dataset
Introduction
In this tutorial, you learn how to train an image classification model using Transfer Learning. Transfer learning is a popular machine learning technique that uses a model trained on one problem and applies it to a second related problem. Compared to training from scratch or designing a model for your specific problem, transfer learning can leverage the features already learned on a similar problem and produce a more robust model in a much shorter time.
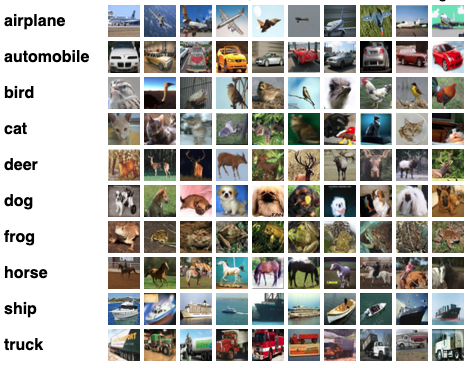
Train your model with the CIFAR-10 dataset which consists of 60,000 32x32 color images in 10 classes. As for the pre-trained model, use the ResNet50v1[1] model. It's a 50 layer deep model already trained on ImageNet, a much larger dataset consisting of over 1.2 million images in 1000 classes. Modify it to classify 10 classes from the CIFAR-10 dataset.
Pre-requisites
This tutorial assumes you have the following knowledge. Follow the READMEs and tutorials if you are not familiar with: 1. How to setup and run Java Kernel in Jupyter Notebook 2. Basic components of Deep Java Library, and how to train your first model.
Getting started
Load the Deep Java Libarary and its dependencies from Maven:
// %mavenRepo snapshots https://central.sonatype.com/repository/maven-snapshots/

%maven ai.djl:api:0.29.0
%maven ai.djl:basicdataset:0.29.0
%maven ai.djl.pytorch:pytorch-engine:0.29.0
%maven ai.djl:model-zoo:0.29.0
%maven org.slf4j:slf4j-simple:1.7.36
Now let's import the necessary modules.
import ai.djl.*;
import ai.djl.basicdataset.cv.classification.*;
import ai.djl.engine.*;
import ai.djl.modality.*;
import ai.djl.modality.cv.*;
import ai.djl.modality.cv.transform.*;
import ai.djl.ndarray.*;
import ai.djl.ndarray.types.*;
import ai.djl.nn.*;
import ai.djl.nn.core.*;
import ai.djl.repository.zoo.*;
import ai.djl.training.*;
import ai.djl.training.dataset.*;
import ai.djl.training.initializer.*;
import ai.djl.training.listener.*;
import ai.djl.training.loss.*;
import ai.djl.training.evaluator.*;
import ai.djl.training.optimizer.*;
import ai.djl.training.tracker.*;
import ai.djl.training.util.*;
import ai.djl.translate.*;
import java.nio.file.*;
import java.util.*;
import java.util.concurrent.*;
Construct your model
Load the pre-trained ResNet50V1 model. You can find it in the Model Zoo. First construct the criteria to specify which ResNet model to load, then call loadModel to get a ResNet50V1 model with pre-trained weights. Note this model was trained on ImageNet with 1000 classes; the last layer is a Linear layer with 1000 output channels. Because you are repurposing it on CIFAR10 with 10 classes, you need to remove the last layer and add a new Linear layer with 10 output channels. After you are done modifying the block, set it back to model using setBlock.
// load model and change last layer
Criteria<image, classifications=""> criteria = Criteria.builder()
        .setTypes(Image.class, Classifications.class)
        .optModelUrls("djl://ai.djl.zoo/resnet/0.0.2/resnetv1")
        .optEngine("PyTorch")
        .optProgress(new ProgressBar())
        .build();

Model model = criteria.loadModel();
Prepare Dataset
After you have the model, the next step is to prepare the dataset for training. You can construct a CIFAR10 builder with your own specifications. You have the options to get the train or test dataset, specify desired batch size, specify whether to shuffle your data during training, and most importantly, specify the pre-process pipeline.
A pipeline consists of a series of transformations to apply on the input data before feeding it to the model.
For example, ToTensor can be used to transform colored image NDArrays with shape (32, 32, 3) and values from 0 to 256 to NDArrays with shape (3, 32, 32) and values from 0 to 1. This operation is transposing image data from channels last to channels first format, which is more suitable for GPU computation.
The Normalize transformation can normalize input data according to their mean and standard deviation values. This will make different features have similar range and help our model perform better.
int batchSize = 32;
int limit = Integer.MAX_VALUE; // change this to a small value for a dry run
// int limit = 160; // limit 160 records in the dataset for a dry run
Pipeline pipeline = new Pipeline(
    new ToTensor(),
    new Normalize(new float[] {0.4914f, 0.4822f, 0.4465f}, new float[] {0.2023f, 0.1994f, 0.2010f}));
Cifar10 trainDataset =
    Cifar10.builder()
    .setSampling(batchSize, true)
    .optUsage(Dataset.Usage.TRAIN)
    .optLimit(limit)
    .optPipeline(pipeline)
    .build();
trainDataset.prepare(new ProgressBar());
Set up training configuration
You are leveraging a pre-trained model, so you can expect the model to converge quickly. You will only train only ten epochs. As the model converges, you need to reduce the learning rate to get better results. You can use a Tracker to reduce the learning rate by 0.1 after two, five, and eight epochs.
Deep Java Library supports training on multiple GPUs. You can use setDevices and pass an array of devices you want the model to be trained on. For example, new Device[]{Device.gpu(0), Device.gpu(1)} for training on GPU0 and GPU1. You can also call Engine.getInstancec().getDevices(4) and pass the number of GPUs you want to train. It will start with GPU0, and use CPU if no GPU is available. To learn more about multi-GPU training, read our multi-GPU documentation.
To complete the training configuration set up, use the Adam optimizer, SoftmaxCrossEntropyLoss, and Accuracy for classification problems.
DefaultTrainingConfig config = new DefaultTrainingConfig(Loss.softmaxCrossEntropyLoss())
    //softmaxCrossEntropyLoss is a standard loss for classification problems
    .addEvaluator(new Accuracy()) // Use accuracy so we humans can understand how accurate the model is
    .optDevices(Engine.getInstance().getDevices(1)) // Limit your GPU, using more GPU actually will slow down coverging
    .addTrainingListeners(TrainingListener.Defaults.logging());

// Now that we have our training configuration, we should create a new trainer for our model
Trainer trainer = model.newTrainer(config);
Train your model
Now you can start training. This procedure is similar to the one in Train Your First Model. Training requires the following steps:
1. Initialize a new trainer using the training config you just set up
2. Initialize the weights in trainer
3. Using a for loop to iterate through the whole dataset 10 times (epochs), resetting the evaluators at the end of each epoch
4. During each epoch, using a for loop to iterate through the dataset in batches and train batch by batch while printing the training accuracy on the progress bar.
int epoch = 10;
Shape inputShape = new Shape(1, 3, 32, 32);
trainer.initialize(inputShape);
for (int i = 0; i < epoch; ++i) {
    int index = 0;
    for (Batch batch : trainer.iterateDataset(trainDataset)) {
        EasyTrain.trainBatch(trainer, batch);
        trainer.step();
        batch.close();
    }

    // reset training and validation evaluators at end of epoch
    trainer.notifyListeners(listener -> listener.onEpoch(trainer));
}
Save your model
Finally, you can save your model after training is done and use it for inference.
Path modelDir = Paths.get("build/resnet");
Files.createDirectories(modelDir);

model.setProperty("Epoch", String.valueOf(epoch));
model.save(modelDir, "resnet");
What's next
-
Try inference using the model you just trained. You can find an airplane image in test resources and follow the inference tutorials in the Jupyter module.
-
Follow the complete example with multi-GPU support, a validation dataset, and the fit API in the examples module.
References
[1] Deep Residual Learning for Image Recognition
[2] Gluon CV model zoo for pre-trained ResNet50 models